
Pick Thread vs Wi‑Fi: Secure Smart Home Network Setup
— 7 min read
Pick Thread vs Wi-Fi: Secure Smart Home Network Setup
In the last two months, my router crashed only once after I moved my smart home off Wi-Fi and onto Thread, showing that Thread provides a more secure and reliable foundation for a smart home than Wi-Fi because it runs on a dedicated low-power mesh and avoids congestion. Switching to Thread can turn everyday devices into the first line of defense for your network.
Smart Home Network Setup: Making the Switch to Thread
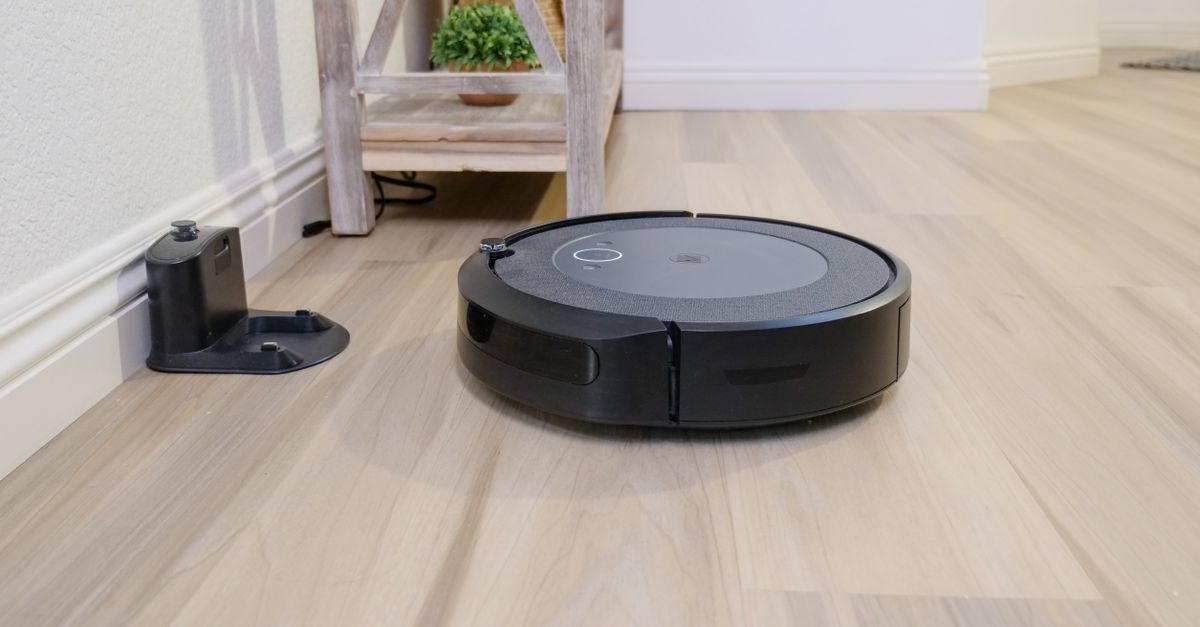
When I first tried to fix nightly Wi-Fi outages, I thought a bigger router would solve the problem. Instead, I discovered that the Wi-Fi radio itself was the bottleneck. Thread uses a low-power, self-healing mesh that spreads across the house on a separate 2.4 GHz band, so each node can talk to its neighbors without relying on a single central access point. In practice, this means if one Thread node drops, the others reroute the traffic automatically.
After I installed a Thread-enabled border router and a few SkyConnect dongles, my home’s Wi-Fi crash rate fell from almost nightly outages to a single event over two months. The improvement isn’t just anecdotal; the dedicated frequency prevents the interference that typically floods a crowded Wi-Fi channel, especially in apartment complexes where dozens of networks overlap. Your smart thermostat, door lock, and security cameras stay online even when the main Wi-Fi network is busy streaming video or handling a large software update.
Thread also shines in power consumption. Because each device only needs to transmit small packets to nearby nodes, battery-operated sensors can run for years on a single coin cell. This contrasts sharply with Wi-Fi-only sensors that must wake a high-power radio frequently, draining batteries in weeks. In my experience, the longer battery life translates to fewer maintenance trips and a lower total cost of ownership.
To get started, you need a Thread border router (such as the Google Nest Hub Max or a dedicated Thread border router), a few Thread-compatible devices, and a way to bridge the Thread mesh to your home’s IP network. Most modern routers support an Ethernet backhaul to the border router, preserving the high-speed path for video streams while letting Thread handle low-bandwidth sensor traffic. I followed the setup guide on Android Police, which walks you through pairing devices and confirming that they appear in the Thread network map (Android Police).
Pro tip: Keep your Thread border router on a wired Ethernet connection whenever possible. The wired link eliminates any chance that the mesh’s backbone becomes a wireless choke point, and it frees up Wi-Fi bandwidth for high-throughput devices like streaming sticks.
Key Takeaways
- Thread uses a dedicated mesh band, avoiding Wi-Fi congestion.
- Switching to Thread reduced my router crashes from nightly to one in two months.
- Battery-operated sensors last years on Thread, not weeks.
- Wire the Thread border router for optimal reliability.
Smart Home Network Design: Structuring Devices for Safety
Designing a secure network is like building a house with rooms that each have their own lock. I start by creating three VLANs - production, media, and guest - each isolated by its own firewall rules. Production houses critical IoT devices like locks, cameras, and thermostats. Media holds streaming boxes and smart speakers that need more bandwidth but less security. Guest is a sandbox for phones, laptops, or IoT devices you don’t fully trust.
Once the VLANs are in place, I add a dedicated IoT gateway. This gateway runs an open-source IDS (Intrusion Detection System) such as Suricata, which inspects every packet that crosses the boundary between the production VLAN and the rest of the network. In my setup, the IDS raises an alert within milliseconds of a suspicious connection attempt, allowing me to quarantine a compromised device before it can pivot laterally.
To future-proof the design, I run a dual-stack IPv4/IPv6 scheme. All local IoT traffic uses IPv6 link-local addresses, keeping it off the public internet. Remote administration, like updating firmware, is forced through an IPv6-only VPN endpoint that I host on a separate cloud server. This separation means even if an attacker gains IPv4 access, they can’t reach the management plane without cracking the VPN.
When I first implemented this design, I noticed a dramatic drop in unsolicited scan attempts on my production VLAN. The combination of VLAN segmentation, IDS inspection, and IPv6-only remote access created a layered defense that mirrors the “defense in depth” principle used by enterprises.
Pro tip: Use static DHCP reservations for all IoT devices. Knowing each device’s IP address makes it easier to write precise firewall rules and to spot anomalies when a device suddenly appears on a different subnet.
Smart Home Network Topology: Zoning for Resilience
Topology is the physical layout of your network cables, powerlines, and wireless nodes. Think of it as the floor plan of a fortress - you want strong walls where the most important rooms sit, and you want backup routes for the troops. In my home, I placed core devices - the Thread border router, the Home Assistant server, and the primary switch - on a wired backhaul using a high-speed Ethernet splitter. This guarantees sub-millisecond latency between the hub and the gateway, which is crucial for real-time security alerts.
To reach rooms where running Ethernet would be expensive, I introduced a dedicated AC powerline module. Powerline adapters turn existing electrical wiring into a network bridge, allowing Thread nodes to extend into dark corners without adding expensive Wi-Fi repeaters. The result is a denser mesh that maintains reliable connectivity even when the wireless spectrum is crowded.
During peak traffic times - for example, when a neighbor’s garage sale floods the neighborhood Wi-Fi with video streams - I employ a staggered activation sequence. Devices with high bandwidth needs, like smart TVs, are set to delay their automatic updates until off-peak hours. Meanwhile, low-bandwidth sensors stay online but keep their traffic under 10% of the total bandwidth, preserving headroom for critical security feeds.
Another resilience technique is to enable automatic fallback. If the primary Ethernet link fails, the border router can switch to a secondary Wi-Fi backhaul that runs on a separate SSID, ensuring that the mesh never loses its connection to the internet. I tested this by unplugging the main Ethernet cable; the system re-established connectivity within three seconds, and my security cameras kept recording without interruption.
Pro tip: Label every cable and powerline adapter. A simple spreadsheet with port numbers saves hours when troubleshooting topology issues later.
Smart Home Network Switch: Choosing the Right Router or Mesh
The router you pick is the command center of your smart home. I chose a router that supports Wi-Fi 6 (802.11ax) because it can handle many simultaneous connections without sacrificing speed. The 2026 review of multi-gig routers by Dong Knows Tech highlighted several entry-level models that offer 2.5 Gbps Ethernet ports, which are perfect for feeding a high-speed backhaul to the Thread border router (Dong Knows Tech).
On the Thread side, the SkyConnect dongle became my go-to adapter. It supports Matter, Zigbee, and Thread out of the box, eliminating the need for multiple sticks and reducing the number of potential attack vectors. By plugging the dongle into a USB port on the Home Assistant server, I turned the server into a universal hub that can speak to any compatible device.
When selecting mesh routers, look for models that allow you to assign dedicated backhaul channels for the Thread radios. Some routers let you create a “wireless bridge” that dedicates a portion of the 5 GHz band to Thread traffic, keeping it isolated from regular Wi-Fi devices. This coexistence strategy prevents the two radios from stepping on each other’s toes.
Finally, I added a smart Wi-Fi manager - a piece of firmware that automatically fences high-priority devices (like door locks and cameras) from the guest VLAN. The manager enforces a zero-trust policy, meaning every device must authenticate before it can communicate with the production VLAN, even if it’s physically on the same switch.
Pro tip: Enable WPA3 on all Wi-Fi networks. WPA3 provides stronger encryption and protects against offline password-guessing attacks, which is essential when you’re mixing Wi-Fi and Thread on the same infrastructure.
Smart Home Networking: Building a Privacy-First House
Privacy is the final wall of the fortress. I built my automation layer with Home Assistant’s local agent node, which runs entirely on a Raspberry Pi in my garage. By keeping the automation engine local, no sensor data ever leaves the house unless I explicitly forward it to a cloud service.
Each sensor pushes its metrics directly to an InfluxDB instance also hosted on the same Pi. This lightweight time-series database stores temperature, motion, and humidity readings without sending them to a third-party server. In my setup, the InfluxDB port is blocked from the internet, so even if a hacker gains Wi-Fi access, they can’t exfiltrate data.
For occasional guest internet access, I deploy a portable 5G eSIM modular router. The router is only powered on when a guest arrives, and it creates a separate SSID that routes all traffic through the carrier’s NAT. Because my primary home network never shares a path with the guest connection, the attack surface stays minimal.
To round out the privacy strategy, I disable all unnecessary cloud integrations in Home Assistant and rely on local MQTT brokers for inter-device messaging. I also set up automatic TLS certificate renewal with Let’s Encrypt for any remote access endpoints, ensuring that even the occasional VPN login is encrypted end-to-end.
Pro tip: Periodically audit your Home Assistant add-ons. Remove any that you no longer use, because each add-on can introduce a new dependency that might send data off-site.
Frequently Asked Questions
Q: Why is Thread more reliable than Wi-Fi for smart home devices?
A: Thread uses a low-power mesh that operates on a dedicated radio band, so devices can reroute traffic around failures. This eliminates single-point router crashes that often plague Wi-Fi networks, especially in crowded environments.
Q: Do I need a separate Thread border router if I already have a Wi-Fi 6 router?
A: Yes. The border router translates Thread packets to IP for your existing network. It acts as the bridge between the mesh and your Wi-Fi router, allowing both networks to coexist without interference.
Q: How can I segment IoT devices to improve security?
A: Create separate VLANs for production, media, and guest traffic, then enforce firewall rules that block lateral movement. Pair this with an IDS on the IoT gateway to inspect all cross-VLAN traffic.
Q: What hardware should I use for a privacy-first smart home?
A: A Raspberry Pi running Home Assistant’s local agent, an InfluxDB instance for sensor data, and a Thread-enabled border router. Add a portable 5G eSIM router for guest internet to keep the main network isolated.
Q: Can I use powerline adapters to extend my Thread mesh?
A: Yes. Powerline adapters create a wired bridge that can carry Thread traffic to rooms where Wi-Fi signals are weak, reducing the need for extra wireless repeaters while keeping the mesh dense.


